
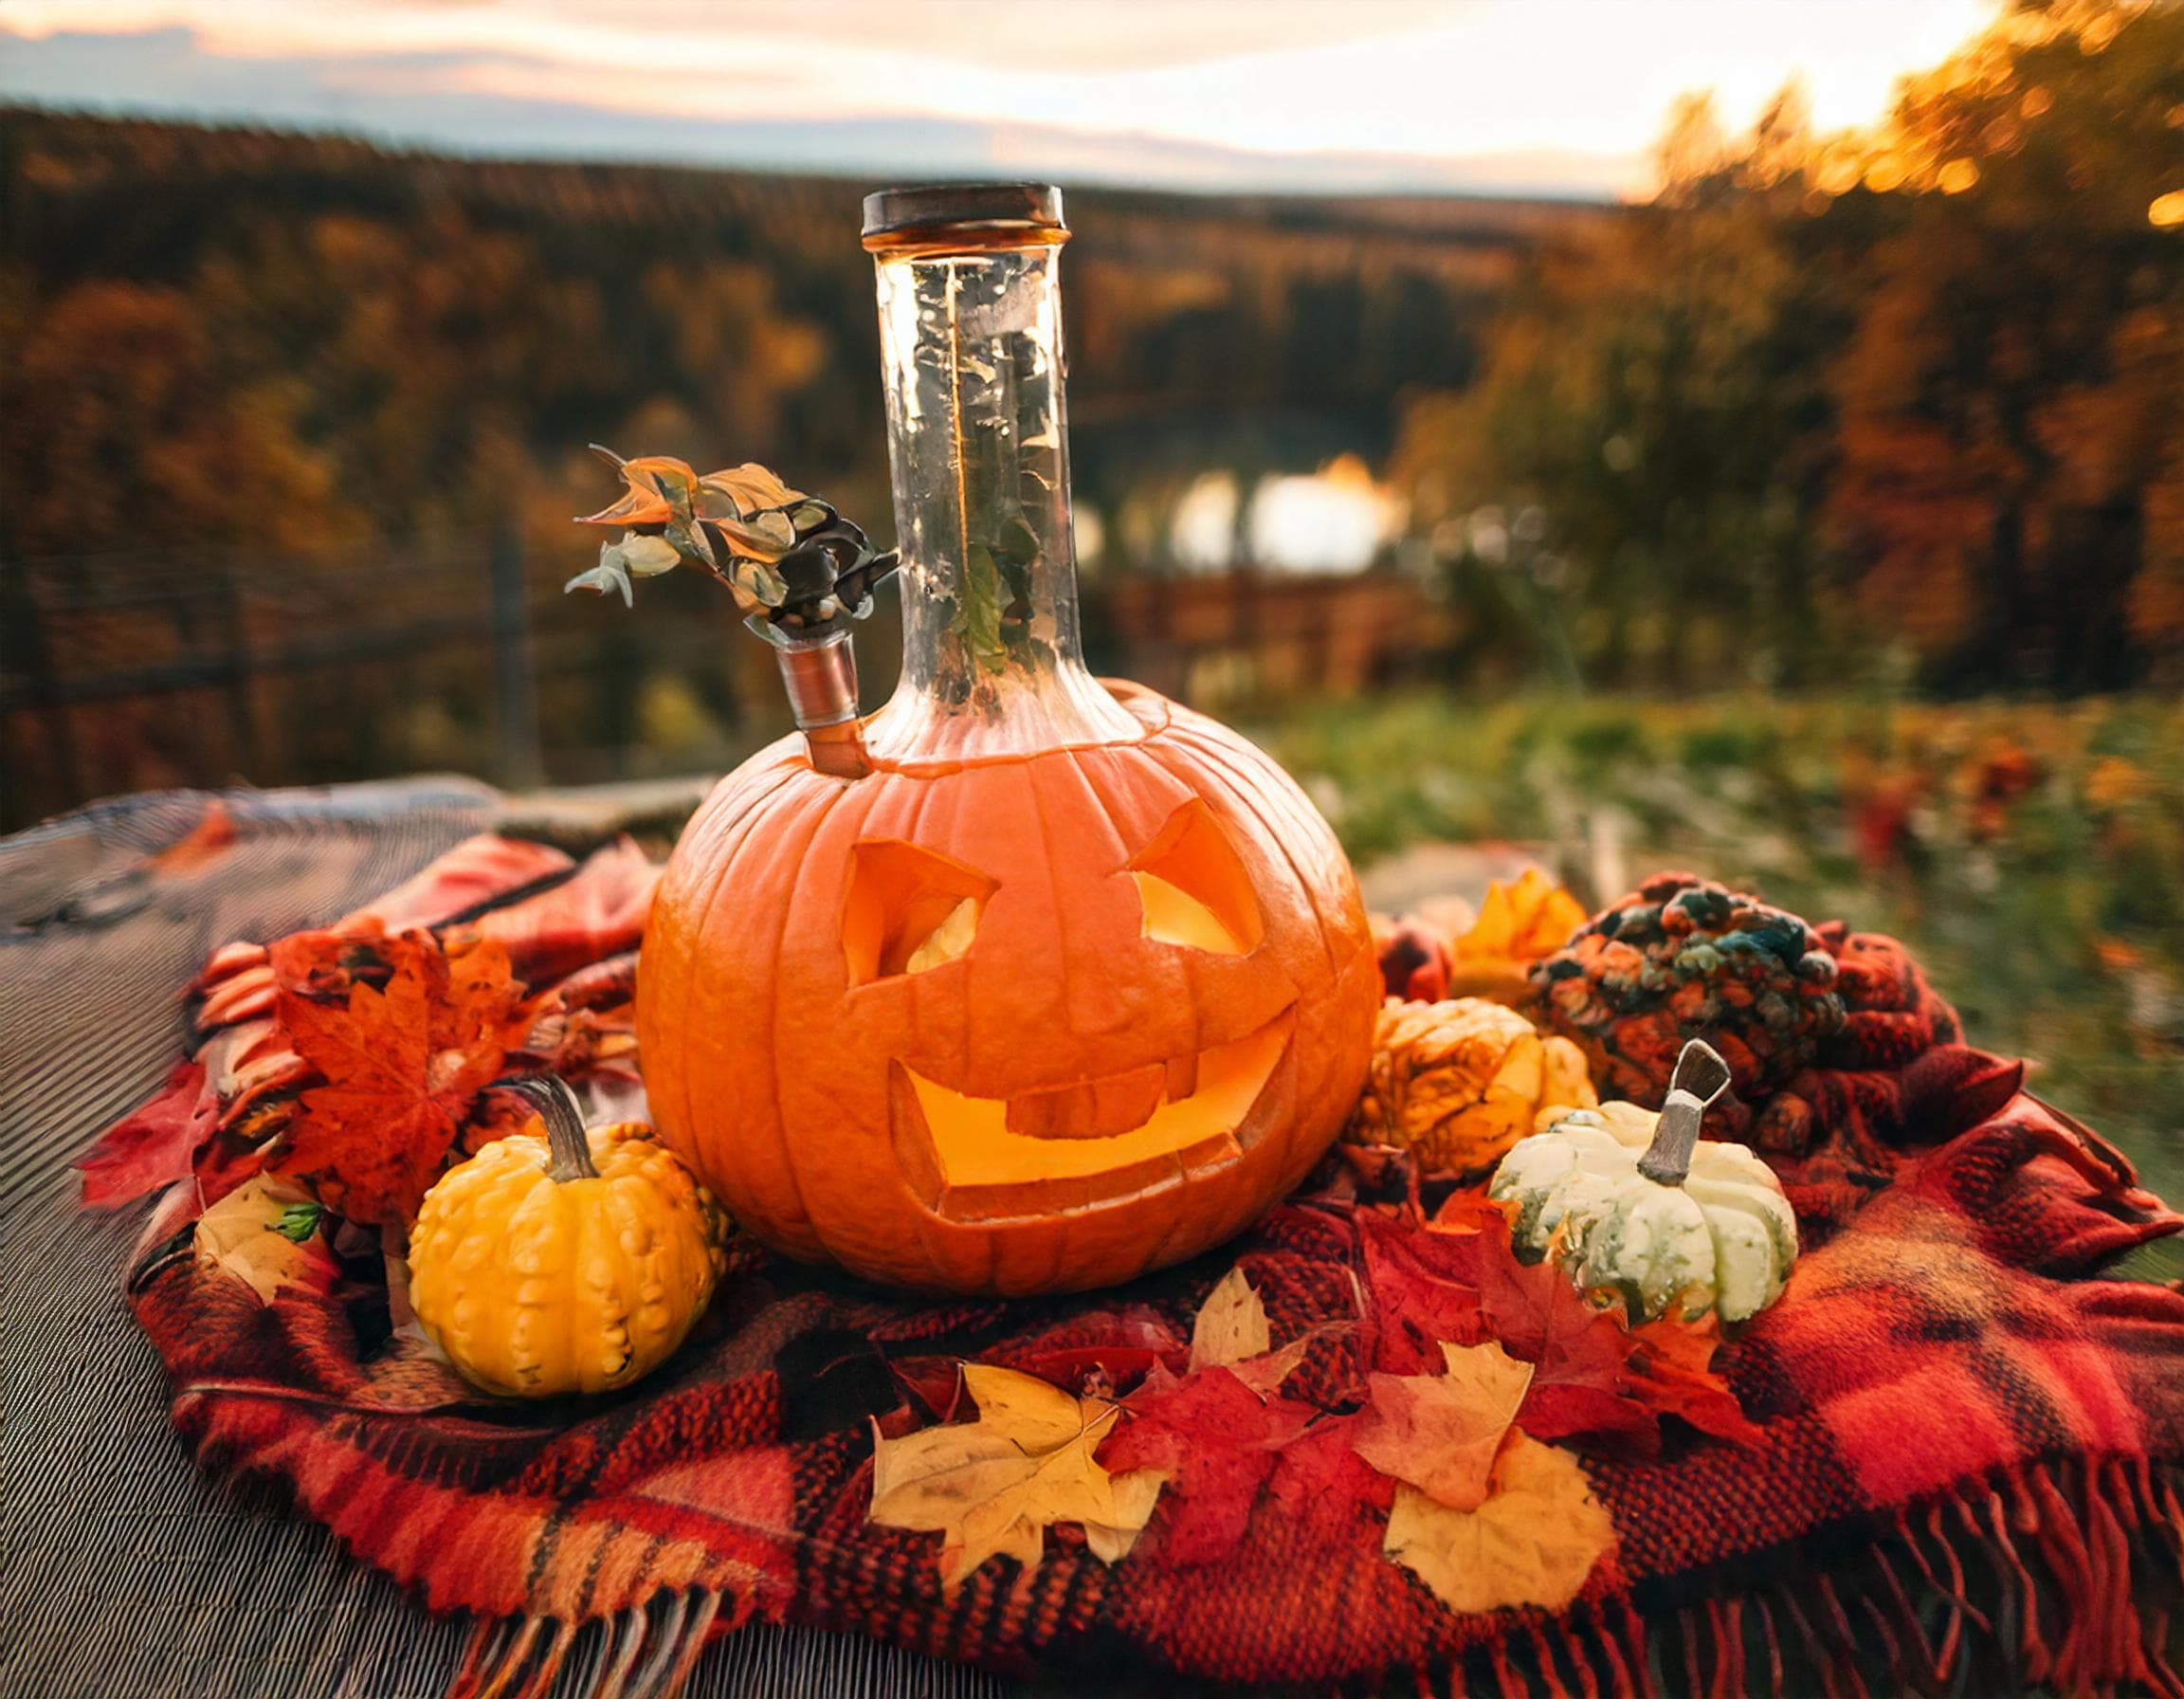
As fall approaches and pumpkin spice fills the air, it’s the perfect time to embrace the season with a fun and unique twist on your smoking experience—a pumpkin bong! Not only is it a festive way to enjoy your herb, but it’s also eco-friendly, easy to make, and adds a fresh, smooth flavor to your smoke. Let’s dive into this simple step-by-step guide on how to create your very own pumpkin bong.
What You’ll Need:
- A small-to-medium-sized pumpkin
- Downstem and bowl (can be borrowed from an existing bong)
- A knife
- A metal or glass straw (or any hollow tube)
- A spoon for scooping
- Lighter
Step 1: Pick Your Pumpkin
Select a pumpkin that fits comfortably in your hands but is big enough to hold water and allow for airflow. Medium-sized pumpkins are typically best. They should have a thick shell and a flat base to sit securely.
Step 2: Hollow It Out
Cut off the top of the pumpkin, much like you’re preparing it for carving. You’ll want to make a hole wide enough to scoop out the insides but not too large. Using your spoon, scrape out all of the seeds and stringy bits until the pumpkin is clean on the inside. This will make your bong more effective and prevent any unwanted flavors or debris from getting in the way.
Step 3: Make the Downstem Hole
On the side of the pumpkin, cut a small hole just big enough to fit your downstem. The ideal spot is at an angle about two-thirds of the way down from the top. Insert your downstem into the hole, making sure it’s snug and secure. If you don’t have a downstem, you can use a pen or tube with a bowl on top.
Step 4: Create the Mouthpiece
Next, cut a second hole on the opposite side of the pumpkin, about halfway up, to use as the mouthpiece. Insert your straw or hollow tube into this hole. Make sure the tube extends far enough inside the pumpkin that it will allow for smooth airflow but doesn’t touch the water.
Step 5: Add Water
Pour some water into the hollowed-out pumpkin, just enough to submerge the tip of the downstem. This will create the necessary filtration for your bong, giving you smoother hits.
Step 6: Pack the Bowl and Light It Up
Now that your pumpkin bong is set up, pack your bowl with your favorite herb. Place the bowl into the downstem, and light up. Inhale through the mouthpiece while covering the carb (if your downstem has one), and enjoy the smooth, autumn-inspired smoke!
Optional: Spice Up Your Pumpkin Bong
For an extra festive touch, try adding cinnamon sticks or other spices to the water for a subtle flavor. You could also carve a face or design into your pumpkin to give it a personalized look. Just be careful not to puncture too many holes in the pumpkin, as this could affect the airflow.
Final Thoughts
Making a pumpkin bong is not only a fun DIY project for the fall, but it’s also a great conversation starter for gatherings or a cozy solo smoke session. It’s a seasonal twist on your typical smoking routine, and it’s bound to make your fall even more memorable. So grab a pumpkin, get creative, and enjoy the flavorful hits from your homemade bong!
Happy fall and happy smoking from Tallulah Smoke Shop!